Garlic Parmesan Cheeseburger Bombs
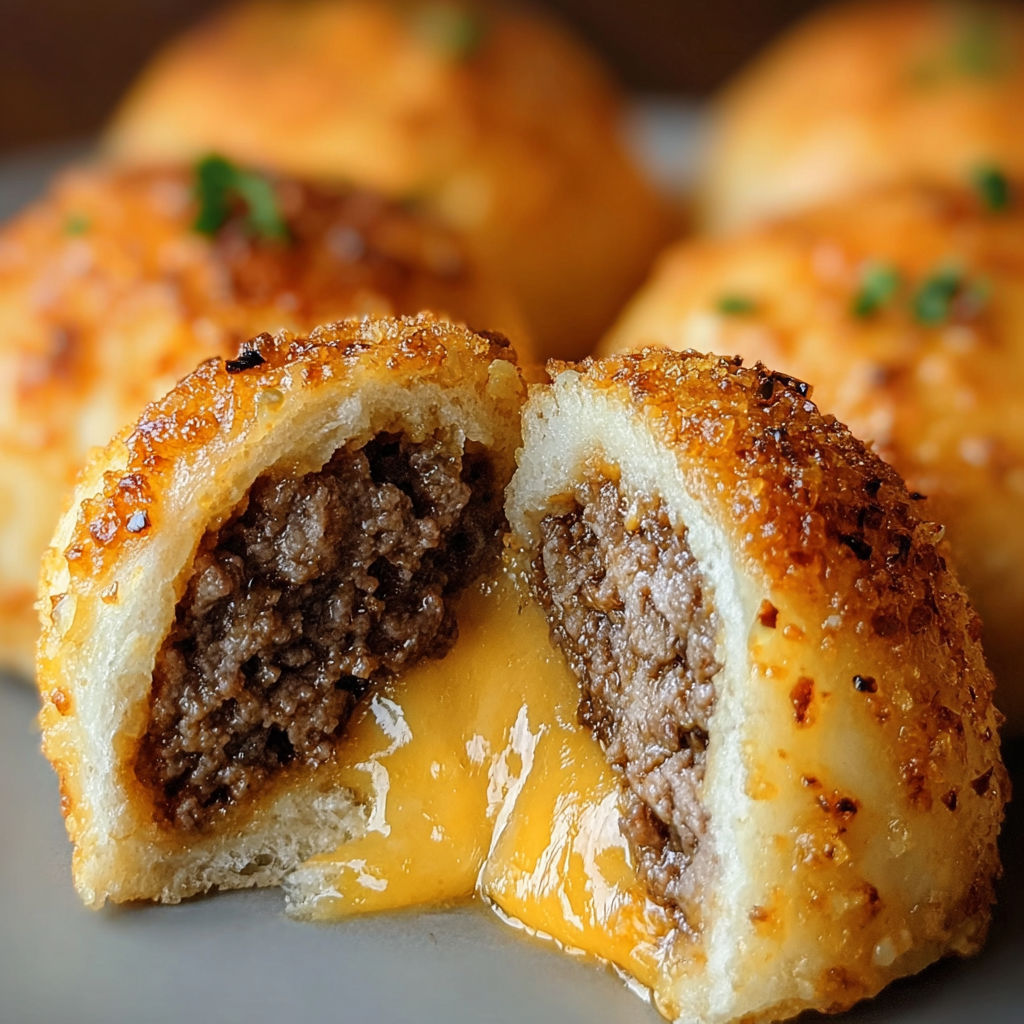
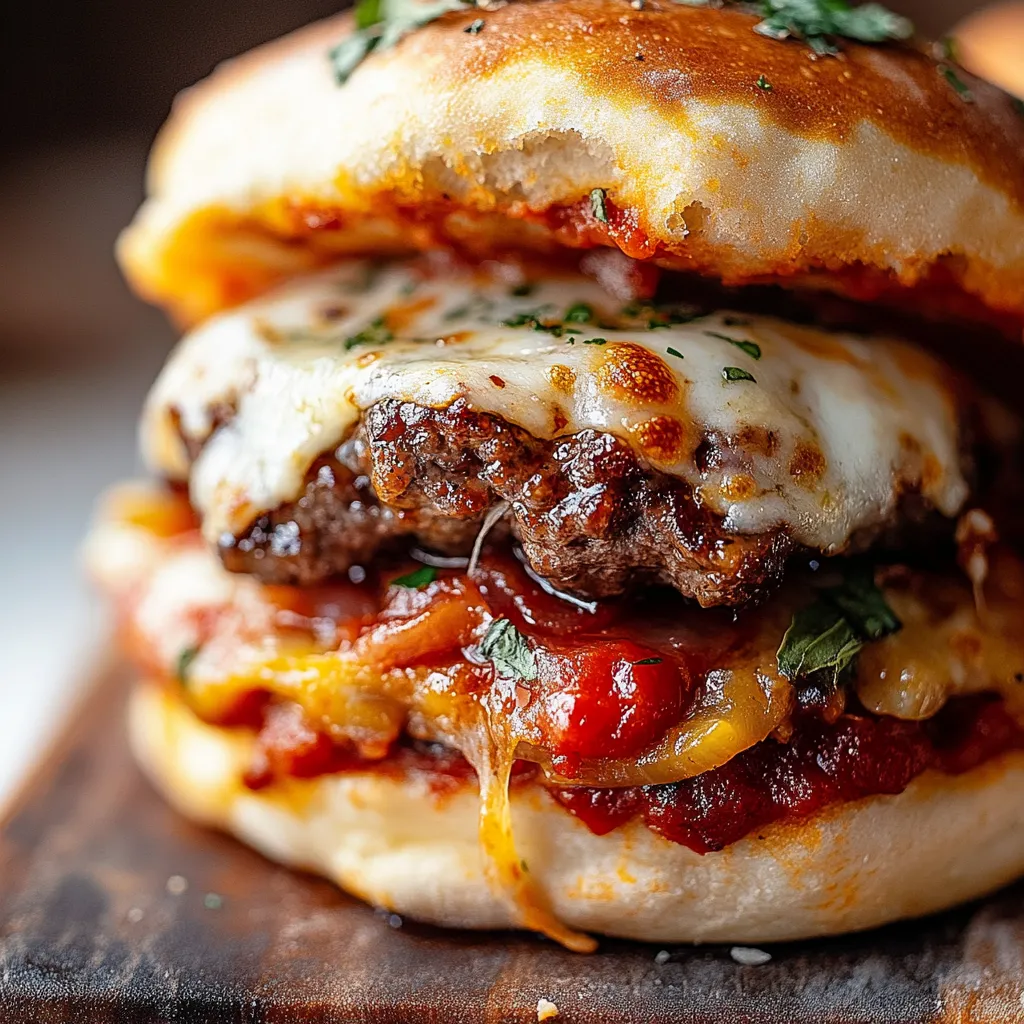
There's something magical about a cheeseburger, but when it's wrapped in flaky biscuit dough and stuffed with gooey cheeses, it becomes an irresistible crowd-pleaser. Home cooks love these Garlic Parmesan Cheeseburger Bombs for game days, potlucks, or even a fun family dinner-they're handheld, flavor-packed, and always a hit. The combination of crispy, buttery biscuit with juicy beef and melted cheddar and parmesan makes every bite unforgettable. Plus, they're easier to make than you'd think!
What Makes This Recipe Special
- The double-cheese filling: a mix of sharp cheddar and creamy cream cheese ensures a rich, melty center that stays gooey even after baking.
- Garlic butter basted biscuits: brushing the bombs with melted garlic butter before baking gives them a golden, aromatic crust.
- Perfectly portioned: using pre-made biscuit dough cuts prep time while keeping the dough tender and flaky.
- Make-ahead friendly: you can prep the bombs in advance and bake them just before serving for a fresh, hot result.
Ingredients
1 poundground beef, lean
1 teaspoongarlic powder
1 teaspoononion powder
Salt, to taste
Black pepper, to taste
1 cupshredded cheddar cheese
1/2 cupcream cheese, softened
1 can(16 ounces) refrigerated biscuit dough
1/4 cupgrated Parmesan cheese
2 tablespoonsunsalted butter, melted
Fresh parsley, chopped (optional)
Nutrition
500 caloriesCalories
Per serving · Values are estimates
Instructions
1
In a large skillet over medium heat, cook ground beef until fully browned. Drain excess fat. Stir in garlic powder, onion powder, salt, and black pepper. Mix until well combined. Allow mixture to cool slightly.
2
Transfer the cooked beef to a mixing bowl. Add shredded cheddar cheese and softened cream cheese. Stir until cheeses are evenly distributed and melted into the beef.
3
Preheat oven to 375°F (190°C). Line a baking sheet with parchment paper. Open biscuit dough and separate into individual portions. Flatten each biscuit into a 4-inch round. Place a heaping tablespoon of beef and cheese mixture in the center of each biscuit round.
4
Carefully bring the edges of each biscuit round up and around the filling, pinching to seal and forming a ball. Arrange sealed balls seam-side down on prepared baking sheet.
5
Brush tops of each bomb with melted butter. Sprinkle evenly with grated Parmesan cheese.
6
Bake in preheated oven for 20 to 25 minutes, or until bombs are golden brown and cooked through.
7
Remove baking sheet from oven. If desired, garnish bombs with chopped fresh parsley. Serve hot.
Essential Tips
Don't overfill
Use about 1 tablespoon of filling per biscuit to prevent bursting during baking. Overfilling can cause the dough to tear and the filling to leak out.
Seal tightly
Pinch the biscuit dough firmly around the filling to create a smooth, sealed ball. This keeps the cheese from oozing out and ensures even cooking.
Chill before baking
If your kitchen is warm or the dough feels too soft, chill the sealed bombs for 10 minutes before baking. This helps them hold their shape.
Use room temp cream cheese
Soften the cream cheese at room temperature for 30 minutes before mixing. Cold cream cheese won't blend smoothly and may leave lumps.
Bake on parchment
Always bake on a parchment-lined tray to prevent sticking and make cleanup a breeze. Parchment also promotes even browning.
Smart Swaps & Variations
Spicy Kick
Mix 1 teaspoon of smoked paprika or 1/2 teaspoon of cayenne pepper into the beef for a smoky, spicy twist.
Bacon Lovers
Fold 4 slices of cooked, crumbled bacon into the cheese mixture for an extra layer of smoky flavor.
Parmesan Crust
Sprinkle 1/4 cup of grated Parmesan directly onto the parchment-lined tray before baking for an extra crispy crust.
What to Serve With This
- Classic fries or sweet potato fries for dipping in garlicky aioli.
- A crisp green salad with a tangy balsamic vinaigrette to balance the richness.
- Ice-cold craft beers or sparkling lemonade for a refreshing contrast.
- Loaded nachos or onion rings for a full game-day spread.
Storage & Reheating
Storage
Store leftover bombs in an airtight container at room temperature for up to 2 days. For longer storage, refrigerate for up to 4 days or freeze for up to 3 months.
Reheating
Reheat in a toaster oven at 350°F (175°C) for 5-7 minutes to restore crispness. Avoid microwaving, as it can make the dough soggy.
Expert Chef Tips
- Use a blend of 80/20 ground beef for the best flavor and juiciness. Leaner beef dries out quickly during cooking.
- Add a pinch of MSG (monosodium glutamate) to the beef mixture for a deeper umami flavor-trust us, it's a game-changer.
- For extra crispiness, bake the bombs on a wire rack set over a baking sheet. This allows air to circulate and crisps the bottom evenly.
Equipment You’ll Need
- Large skillet for cooking the beef
- Mixing bowls for combining ingredients
- Baking sheet lined with parchment paper
- Pastry brush for butter application
Nutritional Benefits
- Each bomb provides approximately 500 calories, with 30g of protein from the beef and cheese, making it a satisfying, high-protein snack.
- The recipe is naturally gluten-free if you use gluten-free biscuit dough, though check labels to confirm.
- The garlic and onion powders add flavor without excess sodium, making these bombs a lower-sodium option compared to many store-bought appetizers.
- Using lean ground beef (80/20 blend) balances fat content while keeping the bombs juicy and flavorful.
Reviews
No written reviews yet — be the first to cook this and share how it turned out!
Leave a Review
Frequently Asked Questions
Can I use homemade biscuit dough instead of refrigerated?
Yes! Homemade biscuit dough works well, but keep it chilled before shaping to prevent sticking. Roll it slightly thinner than store-bought dough for easier handling.
What's the best way to ensure the bombs don't burst in the oven?
Make sure to seal the dough tightly by pinching the edges together firmly. Also, avoid overfilling the bombs-1 tablespoon of filling per biscuit is ideal.
Can I freeze the cheeseburger bombs before baking?
Absolutely. Freeze the sealed bombs on a parchment-lined tray until solid, then transfer to a freezer bag. Bake from frozen, adding 5-7 minutes to the baking time.
How do I reheat frozen cheeseburger bombs?
Reheat frozen bombs directly from the freezer in a toaster oven at 375°F (190°C) for 10-12 minutes, or until heated through and crispy.
Can I make these ahead of time and bake later?
Yes! Prepare the bombs as directed, then refrigerate them for up to 24 hours before baking. Add 3-5 minutes to the baking time if baking straight from the fridge.
What's the best cheese to use for the filling?
A mix of sharp cheddar and cream cheese works best for a balance of flavor and creaminess. Avoid pre-shredded cheese, as it contains anti-caking agents that can make the filling grainy.
Why does my biscuit dough tear when shaping?
If the dough is too cold, it can become brittle and tear. Let it sit at room temperature for 5-10 minutes before shaping. If it's too warm, chill it for 10 minutes to firm up.
Can I use ground turkey or chicken instead of beef?
Yes, but keep in mind that turkey and chicken are leaner and can dry out more easily. Add a splash of beef broth or a beaten egg to the filling to keep it moist.
How do I know when the bombs are done baking?
The bombs are done when the biscuit dough is golden brown and the internal temperature reaches 160°F (71°C). If the tops brown too quickly, tent the tray with foil.
More Gathering Stars
🔒 From the Vault — 43,000+ premium recipes

Cook This Next