5 Minute Air Fryer Chicken Thighs for Crispy Skin on Weeknights
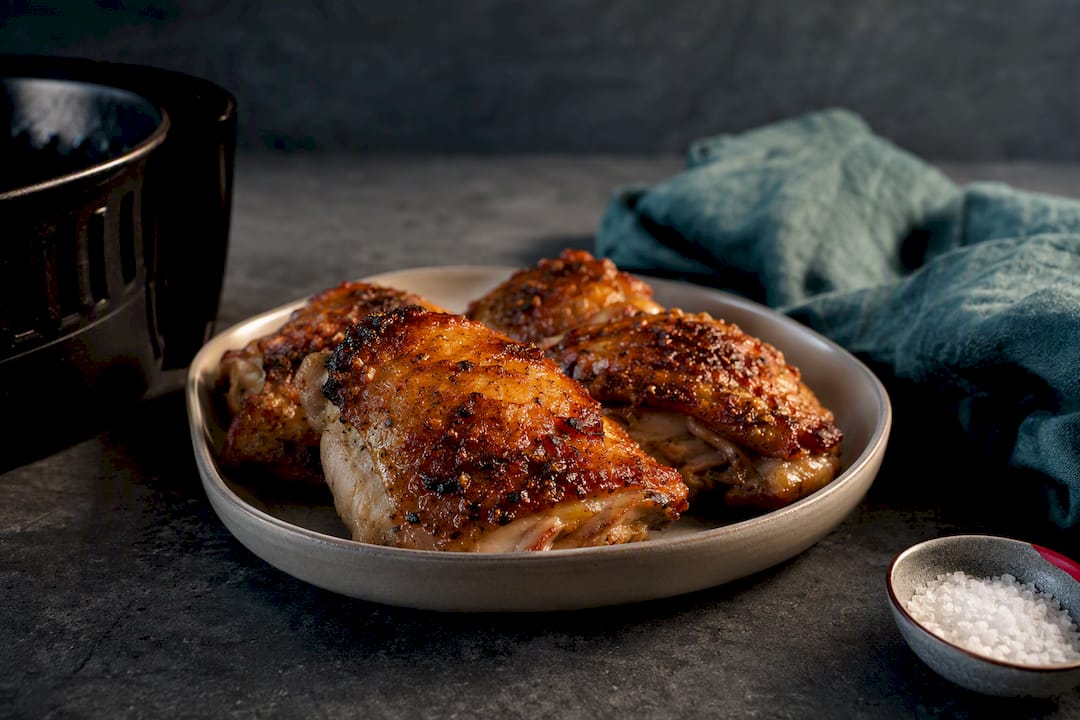
Air fry bone-in, skin-on chicken thighs at 400°F for 16 to 24 minutes, flipping once. Pat the skin bone dry before it goes in the basket, and check for at least 165°F with an instant-read thermometer near the end. Skip the wet marinade if crispy skin is the goal. That’s the whole method, and it works almost every time.
TL;DR:
- Dry brining with salt and baking powder for at least an hour helps achieve crispy skin by removing moisture and increasing surface bubble formation.
- Cooking bone-in, skin-on chicken thighs at 400°F for 16 to 24 minutes with a flip yields optimal browning and interior safety, confirmed by thermometer.
- Crowding the air fryer basket increases cooking time and results in soggy skin; cooking in batches ensures crispness and even doneness.
- Patting the thighs dry before cooking and avoiding wet marinades prevent steam and preserve skin crispiness during air frying.
- Reheat leftovers in the air fryer at 375°F for 4 to 6 minutes to maintain crispness, avoiding the microwave which can make skin rubbery.
Table of Contents
- What You Need for Air Fryer Chicken Thighs
- How to Cook Chicken Thighs in an Air Fryer, Step by Step
- Timing Adjustments and Easy Variations
- The Real Secret to Crispy Skin
- What to Serve With Them and How to Reheat Leftovers
- Why This Recipe Holds Up on a Weeknight
- Troubleshooting Common Air Fryer Chicken Thigh Problems
- A Recipe I Come Back to When the Week Gets Away From Me
- Want More Tested Air Fryer Recipes?
- Sources
- FAQ
What You Need for Air Fryer Chicken Thighs
You don’t need much for this. A handful of pantry staples and about 25 minutes gets you dinner.
Ingredients (serves 4):
- 4 bone-in, skin-on chicken thighs (about 8 ounces each)
- 1 teaspoon kosher salt
- 1/2 teaspoon baking powder (aluminum-free, optional but worth it)
- 1/2 teaspoon black pepper
- 1/2 teaspoon garlic powder or smoked paprika
- 1 teaspoon neutral oil (avocado or canola), or a light spray
Yield and timing: Serves 4. Prep is 5 minutes active, plus an optional 1 to 24 hours of dry-brine time in the fridge. Cook time runs 16 to 24 minutes. Let the thighs rest 5 minutes before serving.
Equipment: A 5 to 6 quart air fryer basket handles four thighs in one layer without crowding. You’ll also want an instant-read thermometer (a Thermapen or any basic digital probe does the job), a set of tongs, and, if your model has one, a wire rack insert to keep air moving underneath the meat.
Method at a glance:
- Pat thighs dry, season with the salt and baking powder mix, and let sit uncovered in the fridge if time allows.
- Preheat the air fryer to 400°F.
- Place thighs skin-side down for the first 10 to 12 minutes.
- Flip and cook until the thermometer reads 165°F to 175°F.
- Rest 5 minutes, then serve.
How to Cook Chicken Thighs in an Air Fryer, Step by Step
This is the exact sequence that gets you crispy skin and juicy meat without guessing.
- Pat the thighs completely dry. Use paper towels and press hard on the skin. Any surface moisture left behind steams instead of crisps, and steam is the enemy of crispy skin.
- Season generously. Mix the salt, baking powder, pepper, and garlic powder or paprika, then rub it under and over the skin. If you have the time, do this step 1 to 24 hours ahead and leave the thighs uncovered on a plate in the fridge; the extra drying time makes a noticeable difference by the time they hit the basket.
- Preheat the air fryer to 400°F. Skipping this step is the most common reason home cooks end up with pale, rubbery skin instead of golden and blistered. The initial blast of hot air sets the surface before the fat has a chance to render slowly, which is what triggers proper browning.
- Load the basket skin-side down. Give each thigh space. This lets the fat render into the pan below and keeps the skin from steaming against its neighbor. Cook for about 12 minutes.
- Flip with tongs. Cook skin-side up for another 8 to 12 minutes, depending on thigh size. Total time lands between 16 and 24 minutes for bone-in, skin-on thighs at 400°F, according to USDA guidance on poultry cooking.
- Check the internal temperature. Insert an instant-read thermometer into the thickest part of the thigh, angled so it avoids the bone. The USDA minimum is 165°F, but many recipe testers finish closer to 175°F because the extra few degrees render more fat and firm up the meat without drying it out, according to Serious Eats’ testing notes.
- Boneless, skinless thighs cook faster. Expect 10 to 14 minutes total at 400°F, flipping halfway. They have no bone to slow heat transfer and no skin layer to crisp, so pull them the moment they hit 165°F to avoid drying them out. If oven-baked boneless is more your speed on a given night, this baked boneless chicken thighs recipe covers that method.
- Rest for 5 to 10 minutes. Tent loosely with foil. The juices redistribute, and the skin actually stays crisper resting on a rack than sitting in its own steam under foil.
Timing Adjustments and Easy Variations
Thigh size, basket space, and starting temperature all move the clock. Here’s how to adjust without ruining dinner.
- Bone-in, skin-on: 16 to 24 minutes at 400°F, flipped once.
- Boneless, skinless: 10 to 14 minutes at 400°F, flipped once.
- Crowded basket: A stacked or touching layer blocks airflow and adds several minutes while producing patchy, soggy skin. Cook in two quick batches instead; it’s genuinely faster than fighting an overcrowded basket for an uneven result.
- From frozen: Add roughly 8 to 10 extra minutes and check temperature well before the clock runs out, since frozen thighs cook unevenly at the edges versus the center.
Three flavor directions worth trying once you’ve nailed the base method: lemon garlic, where you toss the thighs in olive oil, lemon zest, and minced garlic right after patting them dry, then season as usual. Miso ginger, using a thin miso paste rubbed under the skin before the dry salt mix goes on top. Smoked paprika, swapping the garlic powder for smoked paprika and a pinch of cayenne for a smoky, faintly spicy crust. If you want to see one of these ideas fully built out, the ginger scallion oil variation in the Hearthly Recipes vault is a good next stop.
The Real Secret to Crispy Skin
Most soggy-skin failures trace back to one thing: moisture that never had a chance to leave before the heat hit.
Dry-brining is the fix. Salt the thighs, and if you have baking powder on hand, mix in about 1/2 teaspoon per pound. Let them sit uncovered in the fridge for at least an hour, ideally up to 24. The salt pulls moisture to the surface where it evaporates, and the baking powder raises the skin’s pH slightly, which encourages tiny bubbles to form as the skin cooks, according to Tasting Table’s breakdown of the chemistry. Those bubbles increase surface area, and more surface area means more crisping.
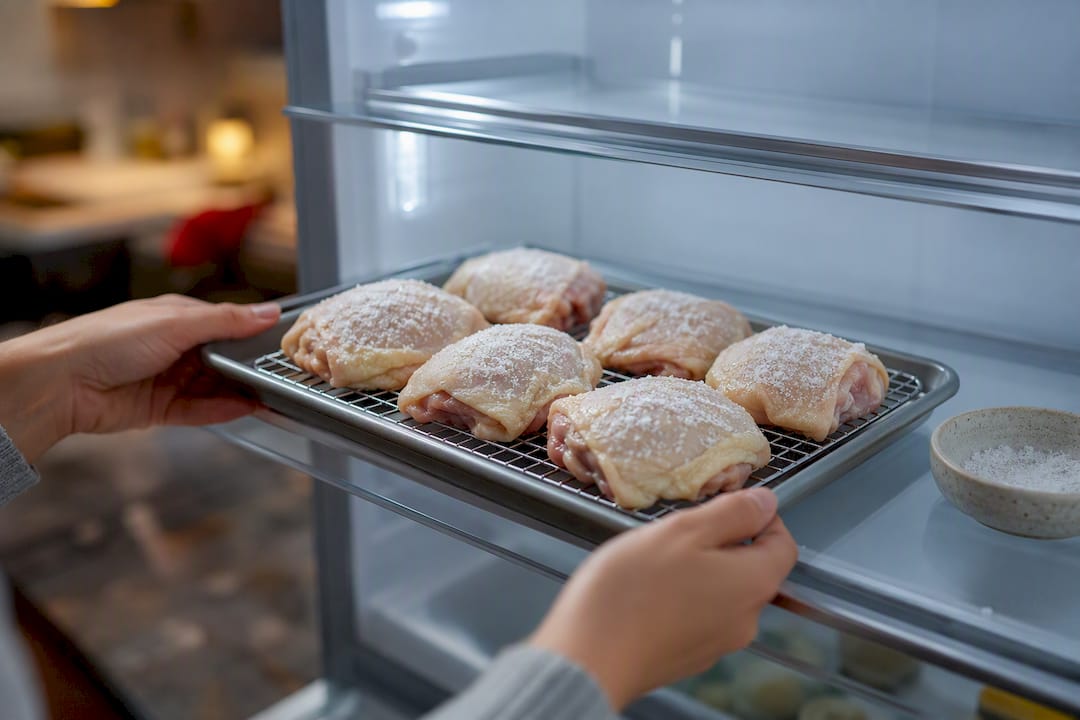
If you’re short on time, even 15 minutes of open-air fridge time after patting the skin dry helps. Skip wet marinades entirely if crispy skin is the priority. They add flavor, but the extra liquid works directly against everything the dry-brine is trying to do, per the same Serious Eats testing. Save marinades for boneless thighs where skin texture isn’t the point.
Pro Tip: Right before the thighs go into the basket, give the skin one more quick pat with a dry paper towel, even after a full dry-brine. That last pass removes any moisture the salt pulled out overnight, and it’s the difference between good skin and genuinely shattering skin.
What to Serve With Them and How to Reheat Leftovers
Crispy chicken thighs pair well with something bright to cut the richness. Air-fried broccoli, a quick cucumber-tomato salad, or simple mashed potatoes or rice all work without competing for oven or stovetop space.
For leftovers, refrigerate within 2 hours of cooking and eat within 3 to 4 days. Skip the microwave, since it turns crispy skin rubbery almost instantly.
- Reheat in the air fryer at 375°F for 4 to 6 minutes.
- Check at the 4-minute mark; thinner pieces recover crispness faster.
- Reheat until the thigh is piping hot throughout, not just warm on the surface.
Why This Recipe Holds Up on a Weeknight
This method comes from Hearthly Recipes’ testing process, where recipes get run multiple times at different thigh sizes and air fryer wattages before publication. Consistency across batches, not just one lucky run, is the bar for what gets published.
Author Susan Scortberg developed this version after repeated testing showed that the dry-brine and thermometer steps mattered far more than any specific seasoning blend. The temperature and timing guidance here lines up with USDA/FSIS poultry safety recommendations, which is the baseline any air fryer chicken recipe should meet before flavor even enters the conversation.
Troubleshooting Common Air Fryer Chicken Thigh Problems
How long should chicken thighs take in the air fryer? Bone-in, skin-on thighs run 16 to 24 minutes at 400°F with a flip halfway. Boneless, skinless thighs take 10 to 14 minutes. Always confirm with a thermometer instead of trusting the clock alone.
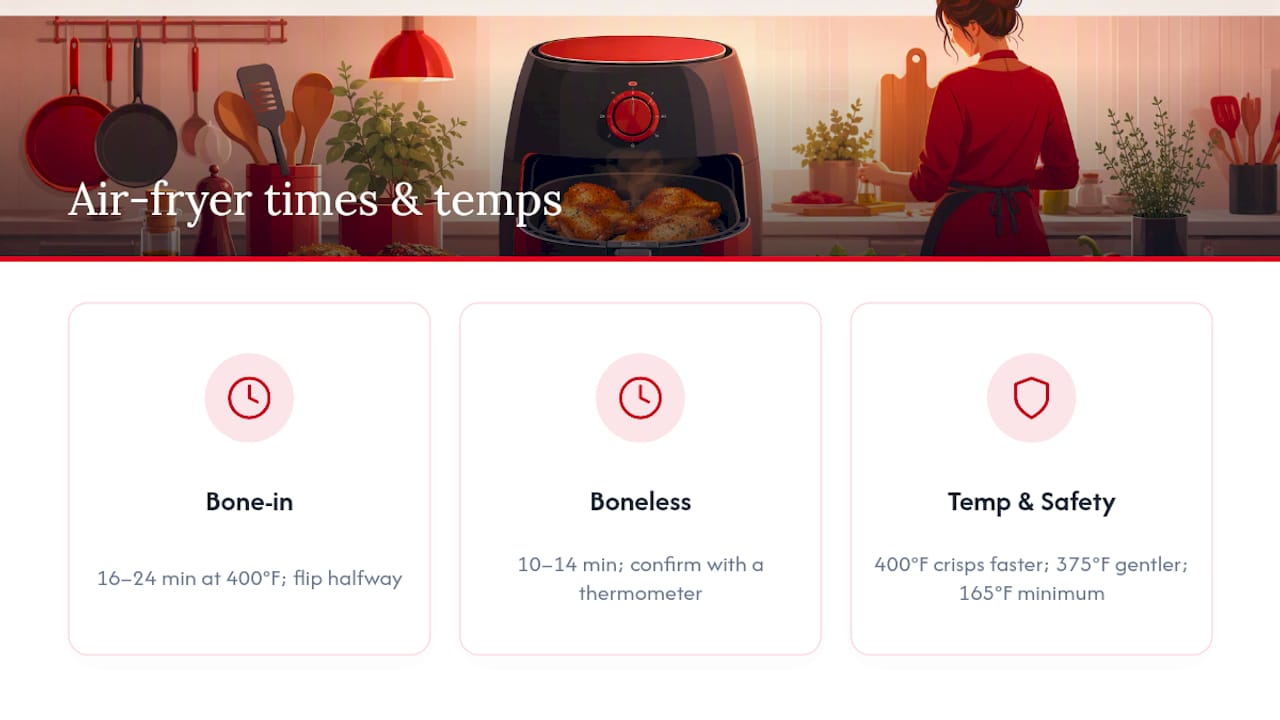
Is it better to air fry at 375°F or 400°F? 400°F browns the skin faster and crisps it more aggressively; 375°F is gentler and more forgiving if you’re worried about the outside cooking faster than the inside. For bone-in thighs with skin, 400°F wins almost every time.
How do I make crispy chicken thighs in an air fryer? Pat the skin bone dry, dry-brine with salt (and baking powder if you have it), cook skin-side down first at 400°F, don’t crowd the basket, and finish with a thermometer check rather than a guess.
Can I put raw chicken thighs directly in the air fryer? Yes, as long as you handle raw poultry safely beforehand, wash hands and surfaces after contact, and cook to at least 165°F internal before eating.
A Recipe I Come Back to When the Week Gets Away From Me
Air fryer chicken thighs earn their spot in regular rotation because the margin for error is small and the payoff is consistent. Get the thermometer step right, and the rest almost takes care of itself. If you’ve only ever made the plain version, try the miso ginger variation next. It takes the same five minutes of extra prep and turns a Tuesday dinner into something you’d actually order at a restaurant.
— Susan Scortberg
Want More Tested Air Fryer Recipes?
Once this one becomes a regular, the next question is usually “what else can I make this way?” Hearthly Recipes’ vault holds more than 43,000 tested recipes, including plenty of other air fryer mains and sides that follow the same principle: dry the surface, get the temperature right, and check with a thermometer instead of guessing.

Browse more air fryer recipes for weeknight variations, or head straight to the full recipe vault to search by ingredient, cook time, or dietary need. If chicken skewers or citrus-forward flavors sound good next, the lemon butter chicken recipe uses the same crisping logic in a different direction. Pick one, gather what’s already in your kitchen, and get cooking tonight.
Sources
- USDA FSIS — Chicken from farm to table
- Serious Eats — Air-Fryer Chicken Thighs
- Tasting Table — Chicken thighs dry-brine explained
FAQ
How long should chicken thighs take in the air fryer?
Bone-in, skin-on thighs need about 16 to 24 minutes at 400°F with one flip; boneless, skinless thighs generally cook faster, needing less time. Confirm doneness with a thermometer. Confirm doneness with an instant-read thermometer rather than relying on time alone.
Is it better to air fry chicken at 375°F or 400°F?
400°F produces crispier, more evenly browned skin on bone-in thighs, while 375°F is a gentler option that’s more forgiving for thicker cuts or if you’re worried about overcooking the exterior.
How do I make crispy chicken thighs in an air fryer?
Pat the skin completely dry, dry-brine with salt and baking powder for at least an hour if possible, cook skin-side down first, avoid crowding the basket, and pull the thighs once they hit 165°F to 175°F.
Can I put raw chicken thighs in an air fryer?
Yes. Just handle the raw meat safely beforehand, wash your hands and any surfaces it touched, and cook it to a minimum internal temperature of 165°F before serving.