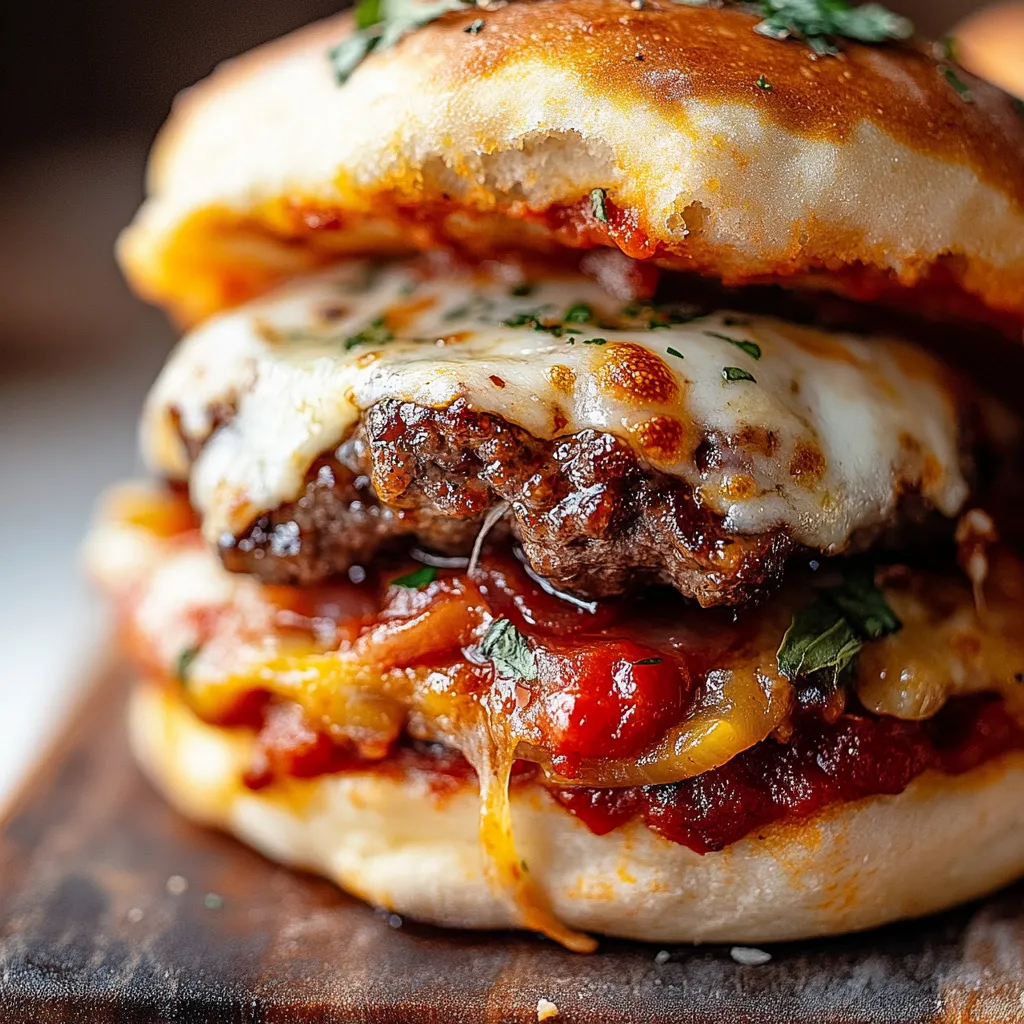
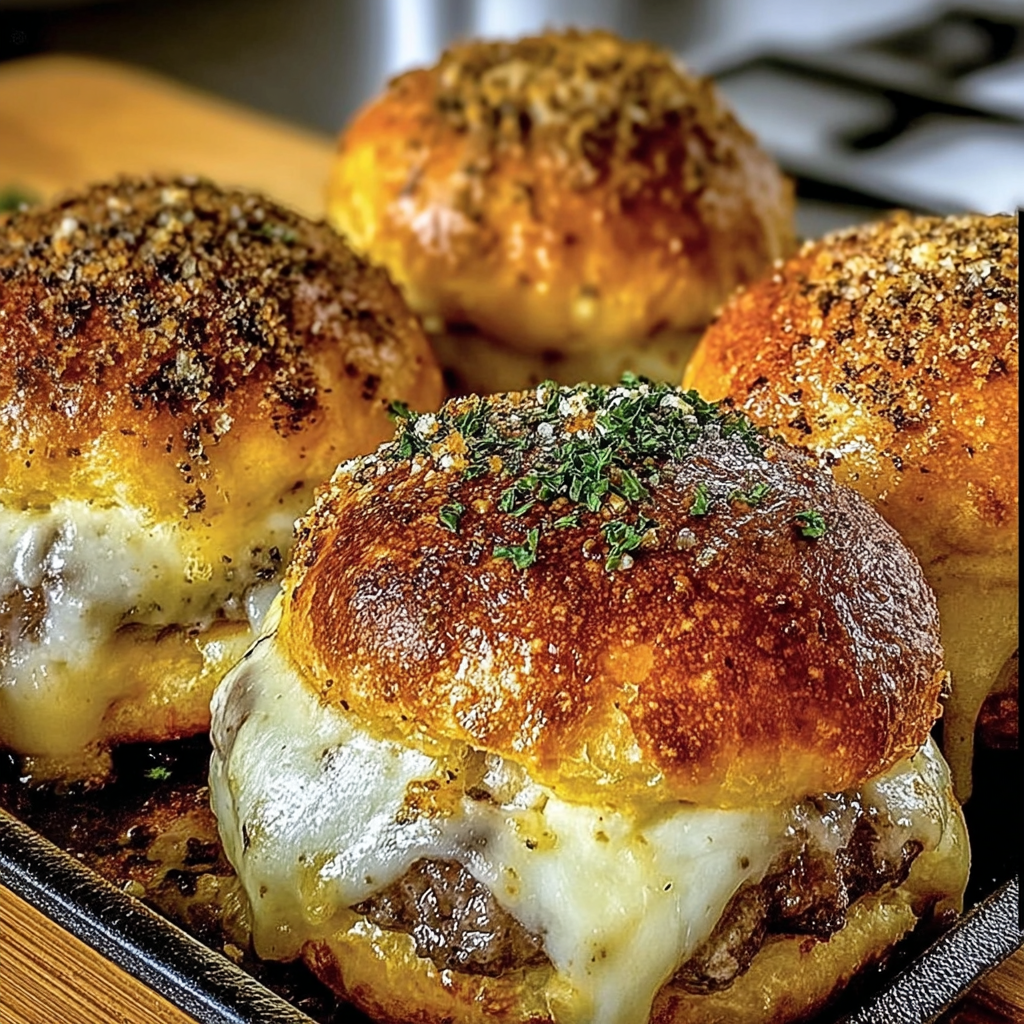
Garlic Parmesan Cheeseburger Bombs
Home cooks adore these Garlic Parmesan Cheeseburger Bombs for their irresistible combination of juicy beef, melted cheese, and flaky biscuit dough-all in one handheld bite. Perfect for game day, potlucks, or a fun weeknight snack, these bombs are a surefire way to impress a crowd. The golden, buttery crust gives way to a savory, cheesy surprise that's impossible to resist. They're quick to make yet feel indulgent, making them a favorite for any gathering.
What Makes This Recipe Special
- The dual-cheese blend of sharp cheddar and nutty Parmesan creates a rich, umami-packed filling that's far more flavorful than a standard cheeseburger.
- Using refrigerated biscuit dough streamlines the process, eliminating the need to make dough from scratch while delivering a perfectly flaky crust every time.
- Folding the beef and cheese mixture into flattened biscuit rounds ensures every bite is packed with flavor-no dry edges here!
- Brushing the tops with melted butter before baking gives the bombs a golden, crispy finish that's visually stunning and irresistibly crisp.
Ingredients
1 pound(450 g) ground beef
2 clovesgarlic, minced (or about 1 teaspoon garlic powder)
½ cup(50 g) grated Parmesan cheese
1 cup(100 g) cheddar cheese, cubed or shredded
Salt, to taste
Pepper, to taste
1 can(approximately 16 oz / 450 g) refrigerated biscuit dough
2 tablespoons(30 g) butter, melted
1 tablespoonchopped fresh parsley (for garnish)
Nutrition
380 caloriesCalories
Per serving · Values are estimates
Instructions
1
Preheat oven to 375°F (190 °C). Line a baking sheet with parchment paper or lightly grease it.
2
In a skillet over medium heat, cook the ground beef with the minced garlic (or garlic powder). Season with salt and pepper. Drain any excess fat.
3
Remove skillet from heat and stir in the Parmesan and cheddar until well combined and slightly melted.
4
Separate the biscuit dough into individual pieces. Flatten each one into a roughly 4–5 inch (10–13 cm) circle.
5
Place about 1–2 tablespoons of the beef and cheese mixture in the center of each dough circle. Fold the dough over the filling, pinching edges closed to seal completely.
6
Place each bomb seam-side down on the baking sheet. Brush the tops with melted butter.
7
Bake for 12–15 minutes, until golden and puffed.
8
Let cool for a few minutes, then garnish with fresh parsley. Serve warm.
Essential Tips
Don't overfill
Use only 1-2 tablespoons of the beef and cheese mixture per bomb to prevent bursting during baking. Overfilling leads to messy, uneven bombs that may leak filling.
Seal edges tightly
Pinch the dough edges firmly to create a tight seal. This keeps the filling from oozing out and ensures the bombs hold their shape while baking.
Room-temperature dough
Let the biscuit dough sit at room temperature for 5-10 minutes if it's cold from the fridge. This makes it easier to flatten and work with, preventing cracks or tears.
Even baking
Place the bombs seam-side down on the baking sheet to prevent them from unraveling. This also ensures they bake evenly and develop a crisp bottom.
Fresh parsley garnish
Sprinkle fresh parsley just before serving to add a pop of color and a subtle freshness that balances the rich, cheesy flavors.
Smart Swaps & Variations
Spicy Kick
Add 1 teaspoon of smoked paprika or ½ teaspoon cayenne pepper to the beef mixture for a smoky, spicy twist.
BBQ Pulled Pork
Swap the beef for pulled pork and mix in 2 tablespoons of BBQ sauce before folding into the dough.
Vegetarian
Replace the ground beef with crumbled veggie burger patties and use plant-based cheeses to keep it vegetarian-friendly.
Breakfast Bombs
Use breakfast sausage instead of beef and add scrambled eggs and crispy bacon bits to the filling.
What to Serve With This
- Classic diner-style fries or tater tots for a nostalgic pairing.
- A creamy ranch or garlic aioli dip to enhance the cheeseburger flavors.
- Iced tea or a cold craft beer for a refreshing contrast to the rich bombs.
- A simple green salad with a tangy vinaigrette to balance the indulgence.
Storage & Reheating
Storage
Store the cheeseburger bombs in an airtight container at room temperature for up to 2 days or refrigerate for up to 4 days. Reheat within these timeframes to maintain freshness.
Reheating
Reheat in a preheated 350°F (175°C) oven for 5-7 minutes to restore crispiness, or microwave for 20-30 seconds for a quick fix. Avoid air fryers to prevent over-browning.
Expert Chef Tips
- For extra umami, add 1 tablespoon of Worcestershire sauce to the beef mixture while cooking. It deepens the savory flavor without overpowering the dish.
- Use a springform pan to bake the bombs together for a more uniform shape and easier serving. Press the flattened biscuit rounds into the pan, add filling, then top with another round to create a single, large 'bomb.'
- If the dough is too sticky, lightly dust your work surface with flour, but avoid adding too much or the bombs may toughen up during baking.
Equipment You’ll Need
- Skillet (for cooking the beef)
- Baking sheet (for oven baking)
- Parchment paper or silicone baking mat (to prevent sticking)
- Pastry brush (for buttering the tops)
Nutritional Benefits
- Each bomb provides approximately 380 calories, making them a satisfying snack or light meal.
- The Parmesan and cheddar add protein and calcium, contributing to bone health and muscle repair.
- Using lean ground beef and draining excess fat can reduce the saturated fat content while keeping the juicy texture.
- The garlic in the filling offers anti-inflammatory benefits and may support immune function.
Reviews
No written reviews yet — be the first to cook this and share how it turned out!
Leave a Review
Frequently Asked Questions
Can I make these ahead of time?
Yes! Assemble the bombs but don't bake them. Freeze them on a tray for 1 hour, then transfer to a freezer bag for up to 1 month. Bake from frozen, adding 3-5 extra minutes to the cooking time.
What's the best way to reheat leftover bombs?
The oven is ideal for restoring crispiness. Reheat at 350°F (175°C) for 5-7 minutes until warmed through. Microwaving works in a pinch but may make the crust soggy.
Can I use homemade biscuit dough instead?
Absolutely! Use your favorite biscuit recipe, but roll the dough slightly thicker (about ¼ inch) to ensure it holds up to the filling. Bake as directed.
How do I prevent the filling from leaking out?
Ensure the dough edges are sealed tightly and don't overfill the bombs. Pressing the dough around the filling with your fingers can also help create a secure seal.
Can I make these gluten-free?
Yes! Use gluten-free biscuit dough and check that all ingredients (like Parmesan and cheddar) are certified gluten-free. The texture may be slightly more fragile, so handle carefully.
What's the best way to shape the bombs for even cooking?
Flatten each biscuit round into a 4-5 inch circle. Place the filling in the center, then fold the dough up and over, pinching the edges together to seal. This ensures even cooking and a uniform shape.
Can I bake these on a convection setting?
Yes! Convection baking will cook the bombs slightly faster (about 10-12 minutes). Keep an eye on them to prevent over-browning.
What's the best cheese to use for the cheddar?
Aged cheddar (like sharp or extra sharp) works best for its bold flavor. Avoid pre-shredded cheese, as it contains anti-caking agents that can make the filling grainy.
More Gathering Stars

🔒 From the Vault — 43,000+ premium recipes
Cook This Next