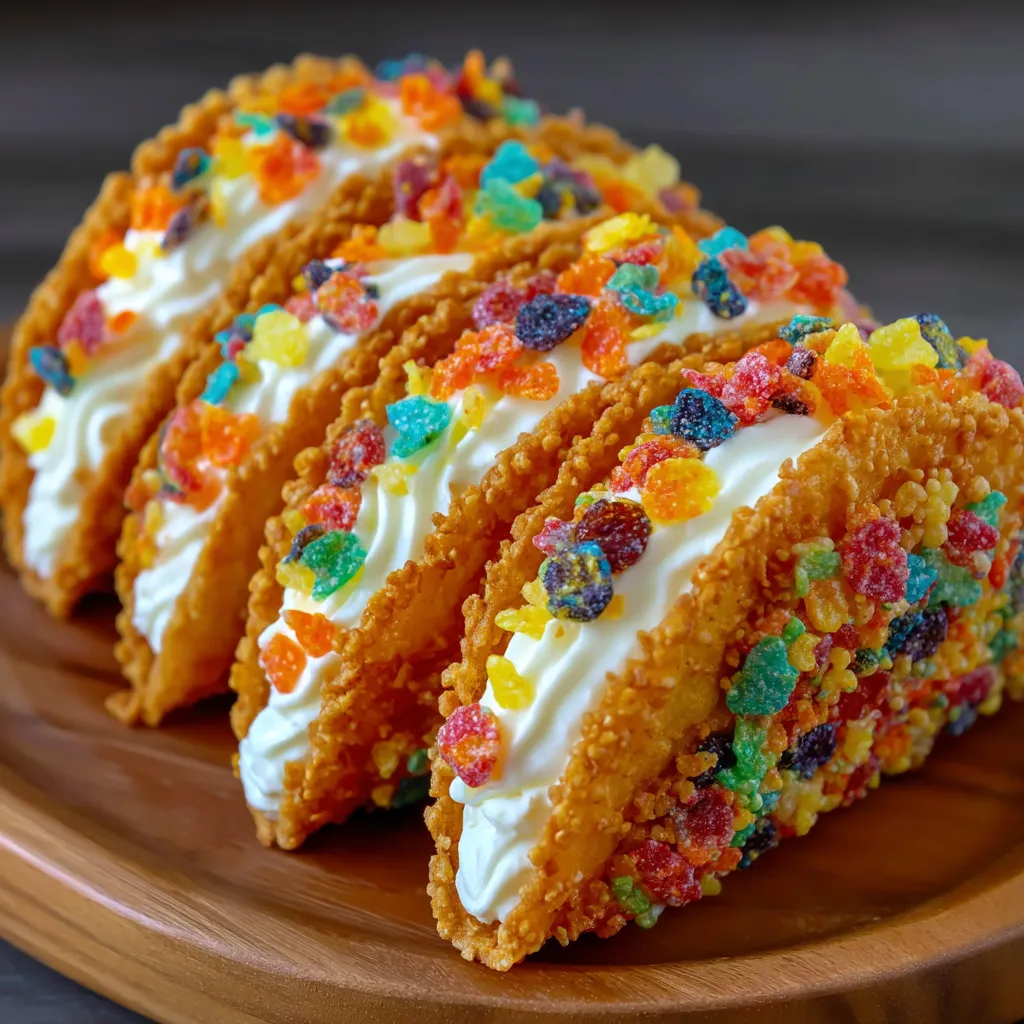
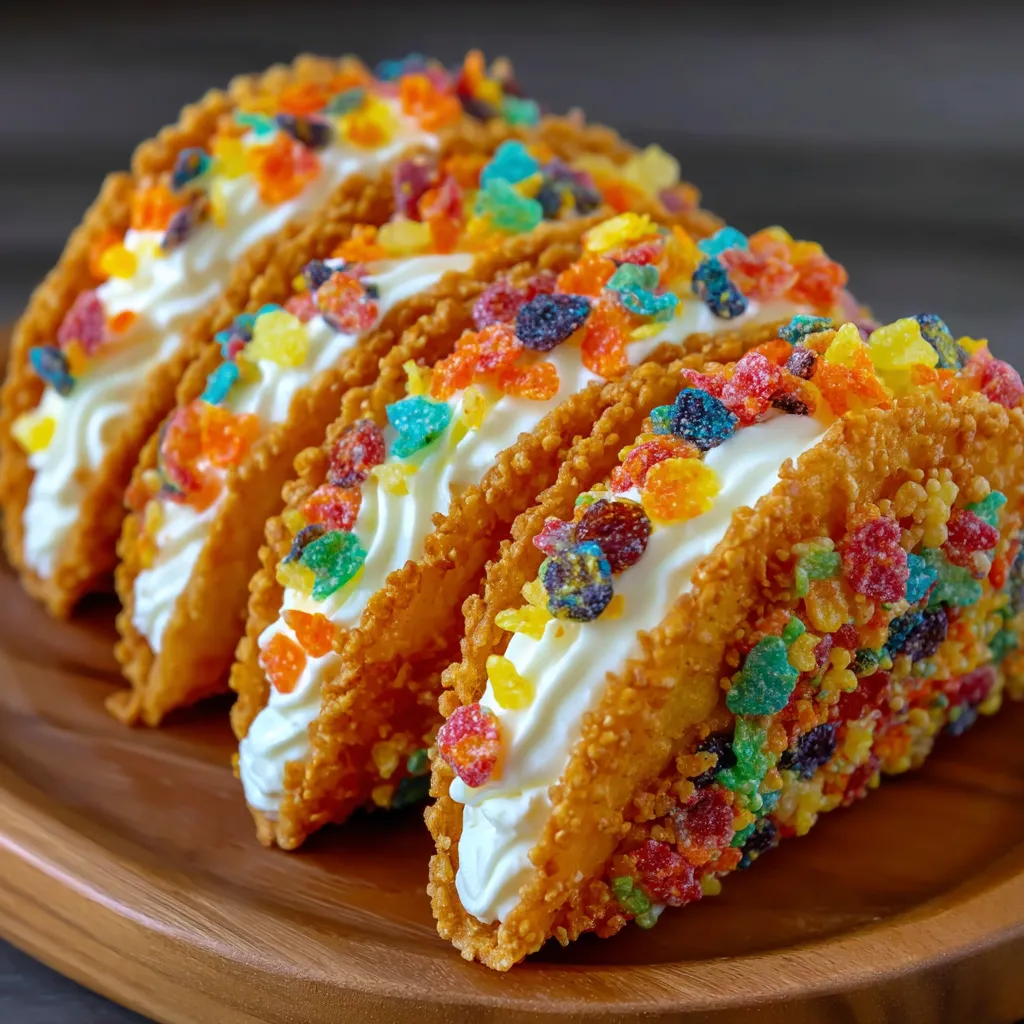
Fruity Pebbles Cheesecake Tacos
There's something magical about turning a beloved childhood cereal into a playful, handheld treat-and these Fruity Pebbles Cheesecake Tacos deliver pure joy in every bite. Home cooks and party hosts alike adore this dessert for its vibrant colors, nostalgic flavors, and surprisingly easy assembly. Whether you're hosting a birthday party, looking for a fun kids' activity, or just craving a whimsical sweet snack, these taco shells filled with creamy cheesecake will steal the show. The contrast of crunchy cereal shells with soft, dreamy filling is simply irresistible.
What Makes This Recipe Special
- The taco-shaped shells are made from crushed Fruity Pebbles cereal and butter, creating a crispy, sweet base that's unlike any traditional pie crust.
- The cheesecake filling is lightened with whipped cream, making it airy and fluffy rather than dense like classic cheesecake.
- These tacos are incredibly customizable-swap the cereal, adjust the sweetness, or add mix-ins like mini marshmallows or chocolate chips.
- They're ready in under 20 minutes with no baking required, perfect for last-minute gatherings or kids' cooking projects.
Ingredients
3 cupscolorful breakfast cereal
1/2 cupmelted unsalted butter
8 ozsoftened cream cheese (room temperature)
1/2 cupsifted powdered sugar
1 tspvanilla extract
1 cupwhipped cream
Extra colorful breakfast cereal
Nutrition
350 caloriesCalories
Per serving · Values are estimates
Instructions
1
Mix the colorful breakfast cereal with melted butter in a bowl. Keep stirring until all pieces get a nice butter coating.
2
Push the mixture firmly into taco-shaped molds or muffin tins. Pack it down well and let it cool in the fridge for at least 30 minutes.
3
Whip the cream cheese with a hand mixer until it's soft and airy. Slowly mix in the powdered sugar and vanilla, beating until you get a smooth mix.
4
Carefully fold the whipped cream into your cream cheese mixture. Use a spatula and mix gently to keep it fluffy.
5
After the shells have hardened, fill each one with plenty of the cheesecake mixture.
6
Scatter some extra cereal on top of your filled shells. You can eat them right away or chill them for a firmer bite.
Essential Tips
Press firmly
When shaping the cereal mixture into taco shells, press down with the back of a spoon or your fingers to create sturdy, even shells that won't crumble when filled. Hollow shells lead to messy tacos!
Chill thoroughly
Don't skip the 30-minute chill time after shaping the shells. This step ensures the butter sets, giving the shells structure and preventing them from going soggy when you add the filling.
Fold gently
When folding the whipped cream into the cream cheese mixture, use a spatula and work in a slow, figure-eight motion to maintain airiness. Overmixing can deflate the filling, making it dense.
Assemble last-minute
Fill the shells just before serving to keep the cereal base crisp. If you must prepare ahead, store the shells and filling separately and assemble up to 2 hours before serving.
Use room-temperature cream cheese
Cold cream cheese won't whip up as smoothly, leaving your filling lumpy and difficult to blend. Let it sit out for at least 30 minutes before starting the recipe.
Smart Swaps & Variations
Chocolate Lovers
Swap Fruity Pebbles for Cocoa Pebbles or chocolate cereal, and fold 2 tablespoons of cocoa powder into the cheesecake filling for a mocha twist.
Nutty Crunch
Add 1/4 cup of finely chopped toasted pecans or almonds to the cereal mixture before pressing into the molds for extra texture.
Fruity Swap
Try different fruit-flavored cereals like Cinnamon Toast Crunch or Lucky Charms for a unique taste and color combination.
No-Bake Option
For a quicker version, skip the cereal shells entirely and layer the cheesecake filling between two graham crackers or sugar cones shaped into cones.
What to Serve With This
- A scoop of vanilla ice cream for a decadent dessert duo.
- Fresh berries like raspberries or strawberries for a tart contrast to the sweet filling.
- A drizzle of caramel or chocolate sauce for an extra indulgent touch.
- Served at birthday parties, baby showers, or as a fun afternoon snack for kids.
Storage & Reheating
Storage
Store the assembled tacos in an airtight container in the refrigerator for up to 3 days. For best texture, store the cereal shells and cheesecake filling separately and assemble just before serving.
Reheating
These tacos are best enjoyed cold or at room temperature. Avoid microwaving, as it will soften the crispy cereal shells. If you prefer a slightly warmer filling, let the assembled tacos sit at room temperature for 10 minutes before serving.
Expert Chef Tips
- For perfectly shaped shells every time, use a silicone taco mold or muffin tin lined with parchment paper cones. This ensures even pressure and easy removal.
- To add a professional touch, pipe the cheesecake filling into the shells using a pastry bag fitted with a large star tip. This creates a decorative swirl on top.
- For a vegan version, use dairy-free cream cheese and whipped topping, and swap the butter for coconut oil. The texture may be slightly softer but still delicious.
Equipment You’ll Need
- Taco-shaped molds or muffin tin (for shaping shells)
- Mixing bowls (2 medium)
- Hand mixer or stand mixer (for cream cheese and whipped cream)
- Spatula (for folding)
- Air-tight container (for storage)
Nutritional Benefits
- One serving (1 taco) provides approximately 350 calories, mostly from carbohydrates due to the cereal base and powdered sugar.
- The dish is high in sugar, primarily from the cereal and powdered sugar, so it's best enjoyed as an occasional treat rather than a daily snack.
- The recipe contains dairy (cream cheese, whipped cream, butter), making it unsuitable for those with lactose intolerance unless substitutions are made.
- The whipped cream adds a small amount of protein, but this dessert is not a significant source of protein, fiber, or vitamins.
Reviews
No written reviews yet — be the first to cook this and share how it turned out!
Leave a Review
Frequently Asked Questions
Can I use a different cereal besides Fruity Pebbles?
Absolutely! Any colorful, crunchy cereal works well. Just avoid overly sugary cereals like Frosted Flakes, as they can make the shells too sweet and sticky. Cocoa Pebbles, Cinnamon Toast Crunch, or even generic fruit loops-style cereals are great alternatives.
Why are my taco shells falling apart when I fill them?
This usually happens if the cereal mixture wasn't pressed firmly enough or if the shells weren't chilled long enough. Ensure the butter-coated cereal is packed tightly into the molds and refrigerated for at least 30 minutes before filling.
Can I make these ahead of time?
Yes! You can prepare the cereal shells up to 2 days ahead and store them in an airtight container at room temperature. Make the cheesecake filling up to 24 hours ahead and store it in the fridge. Assemble the tacos no more than 2 hours before serving to keep the shells crisp.
How do I prevent the cereal from getting soggy?
The key is to fill the shells with the cheesecake mixture just before serving. If you need to prepare ahead, store the shells and filling separately and assemble last-minute. You can also lightly toast the cereal shells in the oven for 2-3 minutes to dry them out slightly before filling.
Can I bake the cheesecake filling instead of using whipped cream?
While this recipe relies on the no-bake method for ease, you could bake the filling like traditional cheesecake by using full-fat cream cheese and eggs. However, the texture will be denser, and the cereal shells may not hold up as well to the extra moisture.
How can I make these gluten-free?
Use gluten-free cereal like Fruity Pebbles (certified gluten-free) and ensure all other ingredients, like the butter and cream cheese, are gluten-free. Check your whipped cream and powdered sugar labels as well, as some brands may contain gluten.
What's the best way to shape the taco shells without molds?
If you don't have taco molds, you can shape the shells by hand using parchment paper to form cones. Press the buttered cereal mixture into the cones, then chill. Alternatively, use a muffin tin to create small cups, then carefully peel away the tin and fold the shells into taco shapes.
Can I freeze these for later?
Freezing is not recommended, as the cereal shells will lose their crispness and become soggy when thawed. The cheesecake filling may also separate or become grainy after freezing and thawing.
More Sweet Comfort

🔒 From the Vault — 43,000+ premium recipes

Cook This Next