
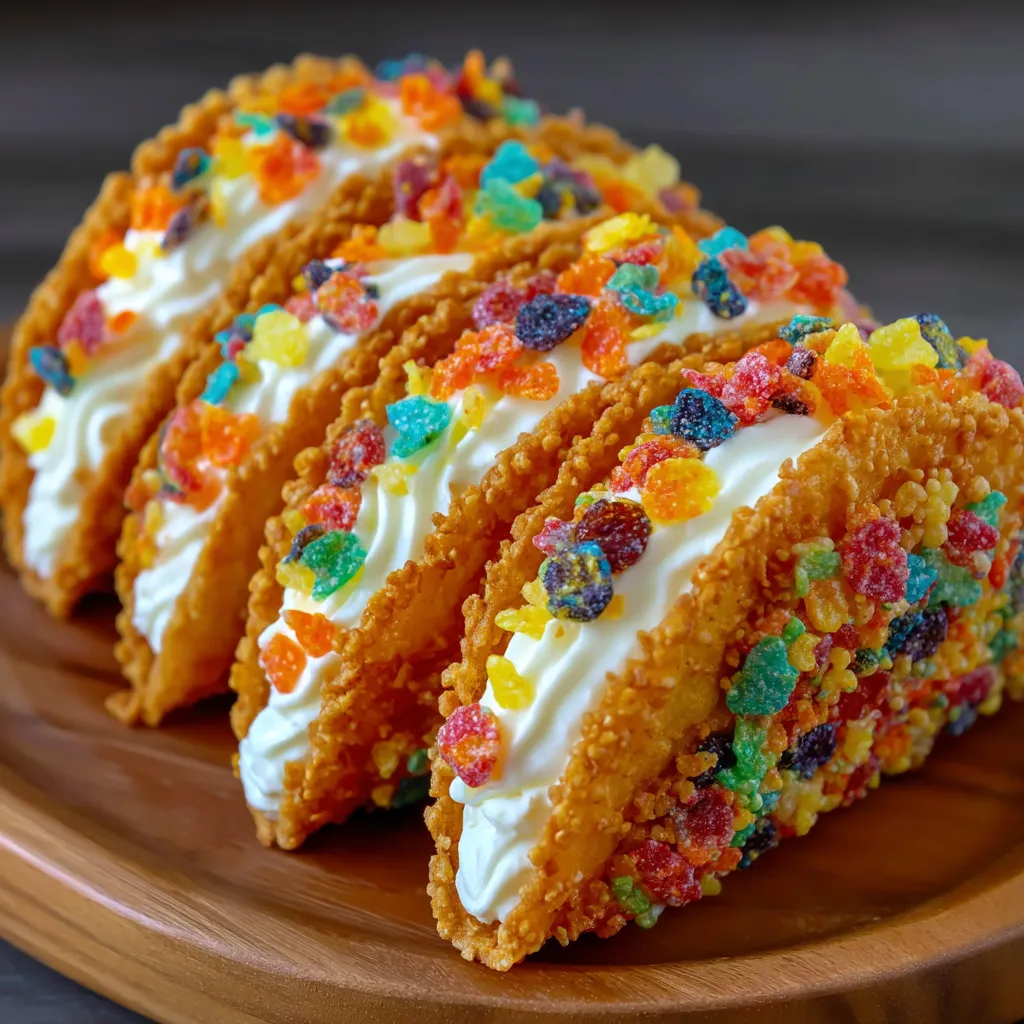
Cereal Taco Desserts
There's something magical about turning a nostalgic breakfast staple into a dessert that feels like a party in your mouth. These Cereal Taco Desserts are the perfect sweet snack for kids' birthdays, movie nights, or just because. The crispy cereal shells give way to a light, fluffy cheesecake filling, while the colorful toppings make them irresistibly fun. Home cooks love how easy they are to customize and how they transform a simple cereal box into something extraordinary.
What Makes This Recipe Special
- The secret to crunchy shells that won't crumble lies in coating the cereal thoroughly with melted butter and packing it tightly into taco shapes.
- Using cream cheese at room temperature ensures a smooth, lump-free filling that blends seamlessly with whipped cream.
- Folding whipped cream into the cream cheese mixture keeps the filling light and airy, mimicking the texture of traditional cheesecake without the baking.
- The recipe doubles as a playful presentation hack-perfect for themed parties or adding a whimsical touch to dessert platters.
Ingredients
3 cupscolorful breakfast cereal
1/2 cupmelted unsalted butter
8 ozsoftened cream cheese at room temp
1/2 cupsifted confectioners' sugar
1 tspvanilla extract
1 cupfluffy whipped cream
Extra colorful breakfast cereal
Nutrition
350 caloriesCalories
Per serving · Values are estimates
Instructions
1
Dump the colorful cereal into a bowl with the melted butter. Mix everything up until all the cereal pieces get a nice butter coating.
2
Pack the mixture down firmly into taco-shaped forms or a muffin tin. Push it in tight and stick them in the fridge for at least 30 minutes to set up.
3
Beat that cream cheese with a mixer till it's super fluffy. Slowly add your sugar and vanilla while mixing until you've got a smooth blend.
4
Take your whipped cream and carefully fold it into your cream cheese mix. Use a spatula and don't overdo it so it stays airy.
5
After your cereal shells have hardened up, scoop a big dollop of the creamy filling into each one.
6
Toss some extra cereal on top of your filled shells. Eat right away or pop them back in the fridge if you want them firmer.
Essential Tips
Prevent soggy shells
Make sure the cereal is completely coated in butter and set in the fridge for at least 30 minutes before filling. This creates a barrier against moisture from the cream cheese filling.
Shape like a pro
Use a small taco-shaped mold or a muffin tin lined with plastic wrap for easy removal. Press the cereal mixture firmly into the crevices to create even, sturdy shells.
Whip it right
Chill your mixing bowl and beaters in the freezer for 10 minutes before whipping the cream. This helps the whipped cream hold its volume longer and fold more easily into the cream cheese.
Fold gently
When combining the whipped cream with the cream cheese, use a spatula and fold in a figure-eight motion. Overmixing can deflate the cream, making the filling denser than desired.
Topping timing
Add the extra cereal toppings right before serving to maintain their crunch. If you add them too early, they'll soften from the cream cheese moisture.
Smart Swaps & Variations
Chocolate Twist
Swap the colorful cereal for chocolate cereal like Cocoa Puffs or Cocoa Krispies, and add 1 tbsp cocoa powder to the cream cheese filling for a mocha-inspired treat.
Fruity Boost
Replace 1/4 cup of the cereal with freeze-dried strawberries or raspberries for a fruity crunch and a vibrant pink hue in the filling.
Nutty Crunch
Add 1/4 cup finely chopped nuts, such as pecans or almonds, to the cereal mixture for an extra layer of texture and nutty flavor.
Vegan Option
Use vegan cream cheese and whipped topping, and ensure the cereal is vegan-friendly. The filling will be slightly less rich but still delightfully creamy.
What to Serve With This
- A glass of cold milk or a creamy milkshake for dipping the taco shells.
- Fresh berries like strawberries, raspberries, or blueberries for a tart contrast to the sweet filling.
- A drizzle of chocolate or caramel sauce for an extra indulgent touch.
- Served at kids' parties, baby showers, or as a fun after-school snack.
Storage & Reheating
Storage
Store the filled cereal tacos in an airtight container in the fridge for up to 2 days. Keep them separate from any toppings until ready to serve to preserve crunch.
Reheating
These are best enjoyed cold or at room temperature to maintain the crispness of the shells. Avoid microwaving, as the heat will soften the cereal and make the filling gummy.
Expert Chef Tips
- For extra-flavorful shells, toast the cereal in the butter for 2-3 minutes over low heat before shaping. This deepens the cereal's flavor and adds a subtle nuttiness.
- Use a piping bag fitted with a large star tip to fill the shells neatly and efficiently. This gives the tacos a professional, bakery-style appearance.
- To make ahead, prepare the shells up to 24 hours in advance. Store them in the fridge and fill just before serving to ensure maximum crunch.
Equipment You’ll Need
- Mixing bowls (2 medium)
- Hand mixer or stand mixer
- Rubber spatula
- Small taco-shaped molds or muffin tin with plastic wrap
- Piping bag (optional, for filling)
Nutritional Benefits
- Each serving (1 taco) contains approximately 350 calories, primarily from the fats in the cream cheese and butter.
- The recipe provides a good amount of calcium from the cream cheese and milk-based ingredients, supporting bone health.
- While indulgent, the portion-controlled nature of these tacos can make them a lighter alternative to traditional cheesecake or other rich desserts.
- The colorful cereal adds a small amount of iron and B vitamins, depending on the type used, though the amounts are minimal due to the small serving size.
Reviews
No written reviews yet — be the first to cook this and share how it turned out!
Leave a Review
Frequently Asked Questions
Can I use any type of cereal?
Yes, but avoid overly sugary cereals like Frosted Flakes, as they can make the shells too soft. Neutral or lightly sweetened cereals like Chex or Rice Krispies work best. For extra flavor, try cinnamon or corn-flavored cereals.
What's the best way to shape the shells without a mold?
Line a muffin tin with plastic wrap, pressing it into each cup to create a mold. Fill the cups with the buttered cereal mixture, pressing it firmly into the shape of a taco shell. Chill, then pop them out before filling.
Can I make these ahead of time?
Absolutely! Assemble the shells up to 24 hours in advance and store them in the fridge. Fill and add toppings just before serving to keep the shells crisp. The filling can also be made a day ahead and stored in the fridge.
How do I prevent the whipped cream from deflating?
Chill your mixing bowl and beaters in the freezer for 10 minutes before whipping. Also, whip the cream to stiff peaks but stop just before it becomes grainy. Over-whipping causes the cream to collapse.
Can I freeze these for later?
Freezing is not recommended, as the moisture from the filling can make the cereal shells soggy. For best results, enjoy them fresh or store them in the fridge for up to 2 days.
What's a good substitute for cream cheese?
Mascarpone or full-fat Greek yogurt can be used, but the texture will differ. Mascarpone will make the filling richer, while Greek yogurt will add tanginess and a lighter consistency.
How can I make these gluten-free?
Use gluten-free cereal and ensure all other ingredients, like the vanilla extract and whipped cream, are certified gluten-free. Check labels carefully to avoid cross-contamination.
Why are my shells falling apart?
This usually happens if the cereal isn't coated well in butter or if it's not packed tightly enough. Make sure every piece is evenly buttered and pressed firmly into the mold. Also, avoid overfilling the shells, as the weight can cause them to break.
More Sweet Comfort


🔒 From the Vault — 43,000+ premium recipes




Cook This Next