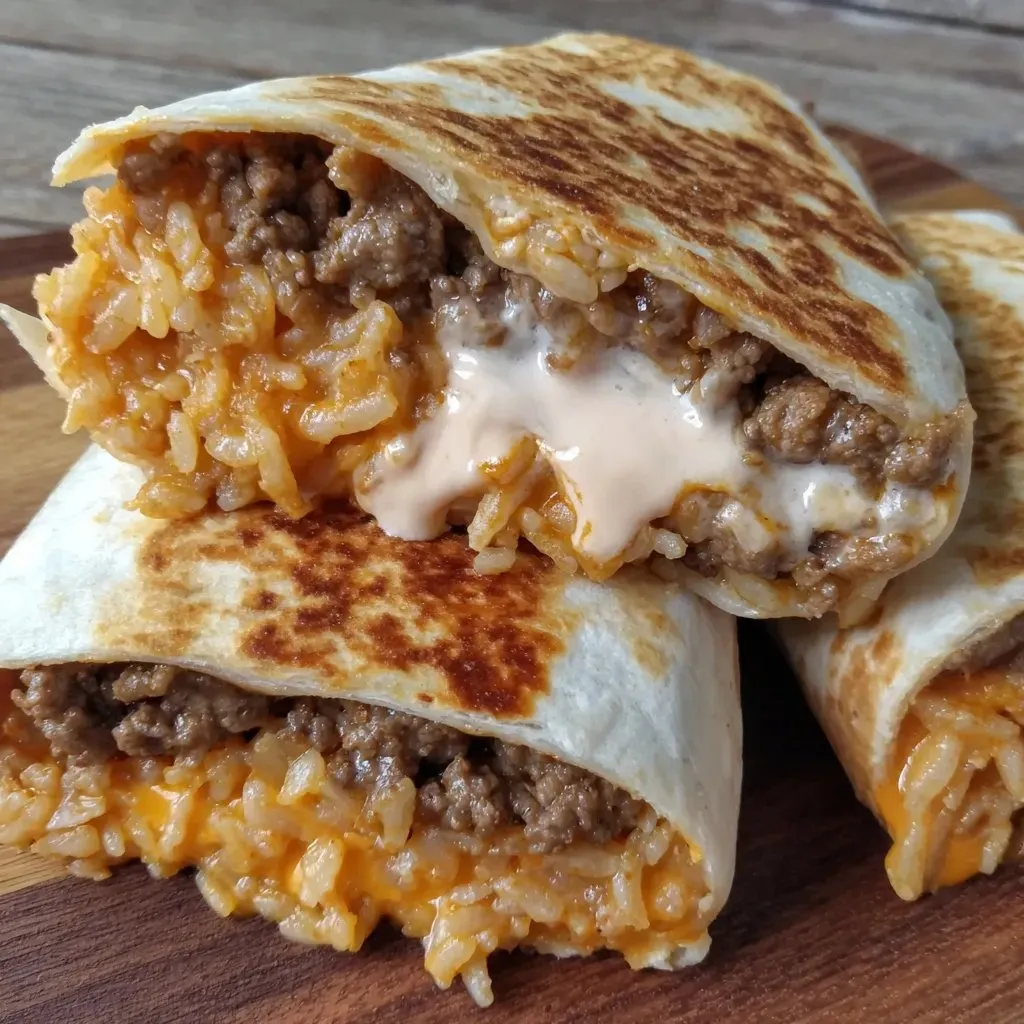
Best Grilled Cheese Burrito
There's something magical about biting into a perfectly crispy burrito that's packed with savory beef, gooey cheese, and a medley of textures. Home cooks love this Grilled Cheese Burrito because it's a fun twist on classic comfort food, combining the best of Tex-Mex flavors with a satisfying crunch. It's ideal for quick weeknight dinners, game day gatherings, or even a lazy Sunday lunch when you want something indulgent without spending hours in the kitchen. The irresistible combination of spicy mayo, fried rice, and melted cheese makes it a guaranteed crowd-pleaser.
What Makes This Recipe Special
- The burrito features a triple-cheese strategy: nacho cheese sauce inside the burrito, sour cream as a creamy layer, and a crispy exterior from grilling.
- Fried rice adds texture contrast and a subtle umami depth, elevating the dish beyond a typical burrito.
- Spicy mayo isn't just a condiment here-it's brushed inside the tortilla for a balanced heat that permeates every bite.
- The burrito is rolled tightly and grilled until the tortilla is golden and crisp, almost like a quesadilla but with all the burrito fillings.
Ingredients
1 lbground beef
1 tablespoonolive oil
1 onion, diced
1 teaspoonsalt and black pepper, adjust to taste
1 teaspoonsmoked paprika
1 teaspoondried oregano
½ cuptomato sauce
4 largeflour tortillas
3 tablespoonsspicy mayo
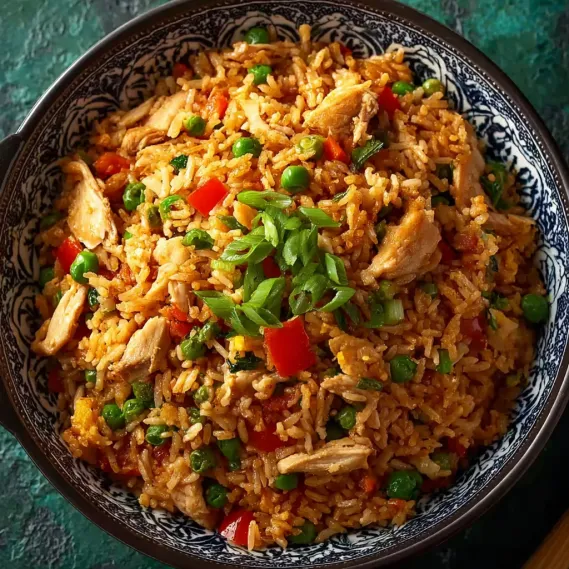
1 cupfried rice
1 cupnacho cheese sauce
1 cupsour cream
1 cuptortilla chips
Nutrition
850 caloriesCalories
Per serving · Values are estimates
Instructions
1
Heat olive oil in a large skillet over medium heat. Add the diced onion and sauté for about 5 minutes until softened and translucent. Add the ground beef to the skillet, cooking it until fully browned. Break up any large pieces as you cook. Season the beef with salt, smoked paprika, and oregano. Stir to combine, allowing the spices to bloom for about 1 minute. Pour in the tomato sauce, lower the heat, and let it simmer for 5 minutes, letting the flavors meld.
2
Lay each flour tortilla flat. Spread about 1 tablespoon of spicy mayo down the center. Add a spoonful of fried rice, then drizzle with nacho cheese sauce. Follow with a dollop of sour cream and a sprinkle of crispy tortilla strips. Add a generous portion of the seasoned ground beef on top.
3
Fold in the sides of the tortilla and roll it up tightly from the bottom, securing the filling. Heat a non-stick skillet or griddle over medium heat. If desired, sprinkle shredded Mexican cheese blend directly onto the hot surface. Place the burrito seam-side down on top of the cheese and grill for 2-3 minutes per side, until the cheese forms a crispy, golden crust.
4
Serve the burritos hot with extra spicy mayo on the side for dipping.
Essential Tips
Toast the tortillas
Lightly toast the tortillas in a dry skillet for 20-30 seconds on each side before adding fillings. This prevents sogginess and ensures a crispy exterior once grilled.
Warm the fillings
Gently warm the nacho cheese sauce and sour cream before adding them to the tortillas. Cold fillings can make the tortilla soggy and harder to roll.
Use leftover rice
Day-old fried rice works best here-it's firmer and less likely to turn mushy when rolled into the burrito. Fresh rice can make the burrito too wet.
Secure the roll
Use a combination of folding sides inward and rolling tightly from the bottom. For extra security, lightly brush the edges with water or beaten egg to help the tortilla seal.
Grill in batches
Avoid overcrowding the skillet. Cook 1-2 burritos at a time to ensure even browning and crispiness. Adding too many at once lowers the skillet's temperature and steams the burritos.
Smart Swaps & Variations
Vegetarian
Swap ground beef for seasoned black beans or crumbled firm tofu. Add sautéed bell peppers and mushrooms for extra texture.
Spicy kick
Add diced jalapeños or a dash of chipotle powder to the beef mixture. Serve with extra hot sauce or sliced fresh chilies.
Breakfast style
Replace fried rice with scrambled eggs, bacon bits, and cheddar cheese. Swap spicy mayo for sriracha or chipotle aioli.
Lighter version
Use lean ground turkey instead of beef, low-fat cheese, and Greek yogurt instead of sour cream. Opt for whole wheat tortillas for added fiber.
What to Serve With This
- Serve with a side of cool cucumber and avocado salsa for a refreshing contrast to the rich burrito.
- Pair with a cold Mexican lager or an iced horchata to balance the spicy and cheesy flavors.
- Add a simple side salad with lime vinaigrette for a lighter element to the meal.
- For a fun twist, serve as sliders by cutting the burritos into smaller portions and skewering with toothpicks.
Storage & Reheating
Storage
Let the burrito cool completely before storing. Wrap tightly in aluminum foil or place in an airtight container. Store in the refrigerator for up to 3 days.
Reheating
Reheat in a skillet over medium heat for 2-3 minutes per side until crispy and heated through. Avoid microwaving, as it can make the tortilla rubbery and the cheese rubbery.
Expert Chef Tips
- Toast the tortilla on both sides before adding fillings to create a moisture barrier, preventing the tortilla from becoming soggy during grilling.
- Use a combination of cheeses-like cheddar for meltiness and Monterey Jack for creaminess-to achieve the perfect texture and flavor balance.
- Press the burrito gently in the skillet with a spatula during the first minute of grilling to ensure even contact with the heat, promoting a uniform crisp.
Equipment You’ll Need
- Large skillet or griddle
- Mixing bowls for fillings
- Rubber spatula for spreading sauces
- Tongs for turning burritos
Nutritional Benefits
- High in protein (35g per serving) from ground beef, making it a satisfying meal that keeps you full.
- Rich in calcium (40% DV) from the melted cheeses, contributing to bone health.
- Contains healthy fats (25g) from sources like sour cream and cheese, which are essential for nutrient absorption.
- Moderate sodium content (1200mg) due to seasoned beef, cheese, and sauces, so those watching sodium may want to adjust seasoning or use low-sodium ingredients.
Reviews
No written reviews yet — be the first to cook this and share how it turned out!
Leave a Review
Frequently Asked Questions
Can I make this burrito ahead of time?
Yes! Assemble the burritos, wrap them tightly in foil, and refrigerate for up to 24 hours. When ready to serve, grill them from cold-add 1-2 extra minutes per side to ensure they're fully heated through.
What's the best way to reheat leftover burritos?
Reheat in a skillet over medium heat for 2-3 minutes per side until crispy and heated through. Avoid microwaving, as it can make the tortilla rubbery and the cheese greasy.
Can I freeze these burritos?
Absolutely. Wrap each burrito tightly in foil, then place in a freezer bag. Freeze for up to 2 months. To reheat, thaw overnight in the fridge, then grill in a skillet until crispy.
How do I prevent the burrito from falling apart when rolling?
Use a sturdy flour tortilla and warm it slightly before filling. Brush the edges with a little water or beaten egg to help it seal. Roll tightly from the bottom and fold in the sides snugly.
What can I substitute for spicy mayo?
Mix mayo with sriracha, chipotle in adobo, or crushed red pepper flakes to taste. Alternatively, use a spicy mustard or chipotle aioli for a different flavor profile.
Can I use pre-cooked rice instead of fried rice?
Yes, but use day-old rice and spread it out to dry slightly before adding to the burrito. Fresh rice is too moist and can make the burrito soggy.
What's the best cheese to use for nacho cheese sauce?
A blend of cheddar and Monterey Jack works best for a smooth, melty sauce. Avoid pre-shredded cheese, as it contains anti-caking agents that can make the sauce grainy.
How do I make sure the beef is flavorful?
Season the beef generously with smoked paprika, oregano, salt, and pepper. Sauté the onions until caramelized to deepen the flavor base. Deglaze the pan with a splash of broth or beer for extra richness.
More 30-Minute Magic

🔒 From the Vault — 43,000+ premium recipes

Cook This Next