
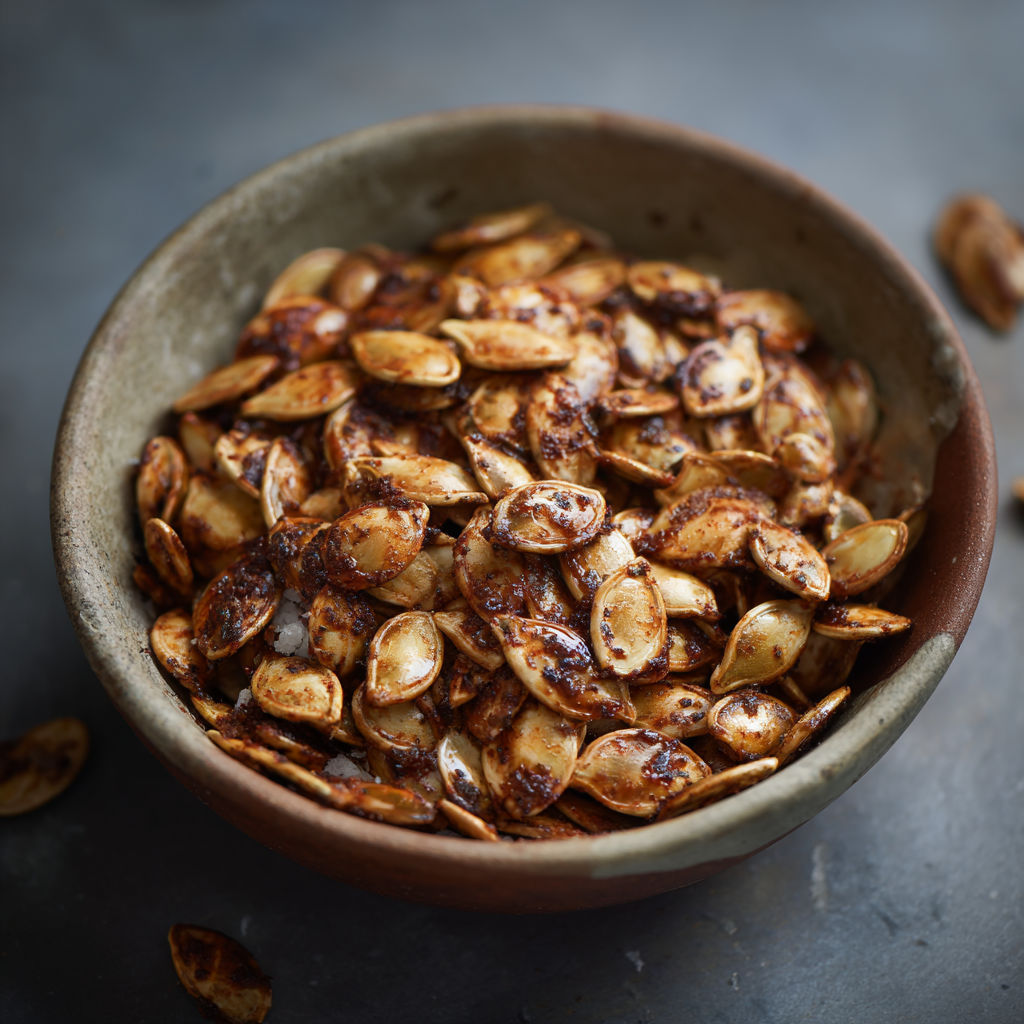
Sweet Roasted Pumpkin Seeds
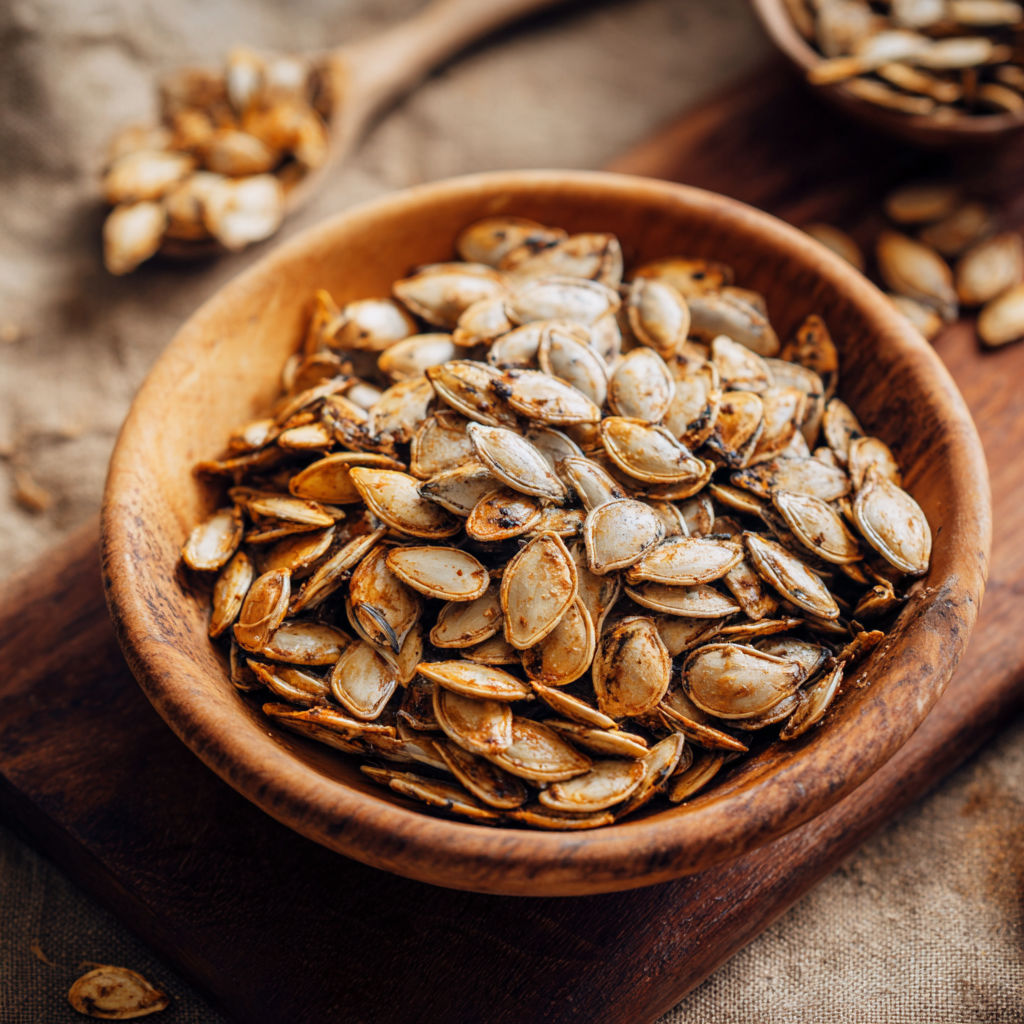
There's something magical about the way pumpkin seeds transform from humble scraps to golden, caramelized morsels that taste like a cross between candy and your favorite nut. Home cooks adore making these for Halloween gatherings, handing out little bags as favors or keeping them on the counter for snacking season. The irresistible crunch and delicate sweetness make them a perfect movie-night treat or a thoughtful edible gift. Plus, they're a delicious way to reduce food waste after carving pumpkins.
What Makes This Recipe Special
- The low-and-slow roast at 300°F ensures the sugar melts and caramelizes evenly without burning, creating a delicate crunch that's far more refined than typical salty pumpkin seeds.
- Brown sugar adds a molasses depth that white sugar can't replicate, giving the seeds a nuanced sweetness that pairs perfectly with the buttery richness.
- A single pinching of salt elevates the sweetness by balancing flavor, making each bite taste more complex and intentional.
- Stirring halfway through baking prevents clumping and ensures every seed gets an even coating of the caramelized glaze.
Ingredients
1 cupraw pumpkin seeds
1 tablespoonmelted butter
1 tablespoonbrown sugar
Pinch of salt
Nutrition
190 caloriesCalories
Per serving · Values are estimates
Instructions
1
Set oven temperature to 300°F (150 °C), ensuring even heat distribution.
2
Combine melted butter, brown sugar, and salt in a medium bowl. Add pumpkin seeds and stir thoroughly to coat.
3
Spread coated pumpkin seeds in a single layer on a baking sheet. Bake for 25 minutes, stirring halfway through, until fragrant and caramelized.
Essential Tips
Don't skip drying seeds
After scooping seeds from the pumpkin, rinse them well to remove any stringy bits, then pat them completely dry with a clean towel. Excess moisture will steam the seeds during roasting, making them chewy instead of crisp.
Use room-temp butter
Melt the butter and let it cool slightly before mixing with the sugar and seeds. Warm butter can cause the sugar to clump or melt unevenly, leading to uneven coating and potential burning.
Spread in a single layer
Even if you have to use two baking sheets, resist the urge to crowd the seeds. Overcrowding traps steam and prevents proper caramelization, resulting in soggy clusters rather than individual crunchy bites.
Avoid stirring too soon
Wait until the 12-minute mark to stir for the first time. The initial 10-12 minutes give the seeds time to set and start crisping, so stirring too early can dislodge the sugar coating before it has a chance to adhere properly.
Watch closely near the end
Start checking the seeds at 20 minutes. They can go from perfectly golden to burnt in under a minute once caramelization reaches its peak. Remove them as soon as they smell fragrant and are deeply golden.
Smart Swaps & Variations
Spiced Pumpkin Seeds
Add ½ teaspoon ground cinnamon, ¼ teaspoon ground ginger, and a pinch of cayenne for a warm, slightly spicy twist that pairs beautifully with autumn flavors.
Maple-Pecan Style
Replace brown sugar with 1 tablespoon pure maple syrup and toss in 2 tablespoons finely chopped toasted pecans along with the seeds after baking for a richer texture.
Dark Chocolate Drizzle
Once cooled, drizzle melted dark chocolate over the seeds and sprinkle with flaky sea salt for a dessert-like treat that feels indulgent.
Savory Garlic-Herb
Omit brown sugar and salt, and instead toss seeds with 1 teaspoon olive oil, ½ teaspoon garlic powder, ½ teaspoon dried thyme, and a pinch of black pepper for a sophisticated snack.
What to Serve With This
- Warm apple cider or spiced chai tea for a cozy autumn pairing.
- Scoop into small paper cones as party favors for a Halloween gathering.
- Sprinkle over vanilla ice cream or pumpkin spice ice cream for a crunchy topping.
- Pack in cellophane bags with a ribbon for thank-you gifts after a pumpkin-carving party.
Storage & Reheating
Storage
Store cooled seeds in an airtight container at room temperature for up to 2 weeks. For longer storage, keep them in the refrigerator for up to 1 month to maintain their crunch.
Reheating
To restore crispiness, warm seeds in a dry skillet over medium-low heat for 2-3 minutes, stirring often. Alternatively, spread them on a baking sheet and reheat at 300°F for 5 minutes, stirring once halfway through.
Expert Chef Tips
- For ultra-crisp seeds, soak them in a bowl of water with 1 teaspoon white vinegar for 10 minutes before drying. This removes any residual pumpkin membrane and ensures the sugar coats cleanly.
- Use a silicone baking mat instead of parchment paper for even heat distribution and zero risk of the seeds sticking or burning on the edges.
- If your seeds aren't browning enough, sprinkle a tiny bit of baking soda over them right before baking. The alkaline environment accelerates browning without altering flavor.
Equipment You’ll Need
- Medium mixing bowl for tossing seeds
- Baking sheet or silicone mat
- Measuring spoons
- Pastry brush or spoon for coating
Nutritional Benefits
- Each serving (¼ cup) provides 190 calories, primarily from healthy fats in the pumpkin seeds, making them a nutrient-dense snack.
- Pumpkin seeds are rich in magnesium, with one serving contributing about 15% of the daily value, supporting muscle and nerve function.
- Contains no cholesterol and is low in sodium when made with minimal salt, aligning well with heart-healthy dietary guidelines.
- One batch (4 servings) provides 5 grams of plant-based protein per serving, contributing to satiety and balanced snacking.
Reviews
No written reviews yet — be the first to cook this and share how it turned out!
Leave a Review
Frequently Asked Questions
Can I use frozen pumpkin seeds instead of fresh?
Yes, frozen pumpkin seeds work fine as long as they're fully thawed and completely dry before roasting. Frozen seeds may take slightly longer to crisp, so extend baking time by 2-3 minutes and check frequently after the initial 20 minutes.
Why are my seeds clumping together?
Clumping usually happens when too much moisture remains on the seeds or when the sugar coating isn't fully dry before baking. Make sure seeds are thoroughly patted dry and avoid adding extra liquid to the coating mix.
Can I make these ahead for a party?
Absolutely. Roast the seeds up to 3 days ahead and store them in an airtight container at room temperature. Bring them to room temperature before serving to restore their signature crunch.
Are these seeds gluten-free?
Yes, these seeds are naturally gluten-free as long as all ingredients (butter, sugar, salt) are certified gluten-free. Always double-check labels if you have celiac disease or gluten sensitivity.
Can I use coconut oil instead of butter?
Yes, coconut oil works well and adds a subtle tropical note. Use refined coconut oil for a neutral flavor or unrefined for a hint of coconut aroma. Keep in mind the seeds may brown slightly faster.
Why did my seeds burn even though I followed the time?
Oven temperatures can vary by 25°F or more, and older ovens often run hotter. Use an oven thermometer to verify your temperature, and start checking seeds at 20 minutes instead of waiting for the full 25.
Can I halve the recipe?
Yes, this recipe is easily halved. Use a small mixing bowl and reduce the baking time to 15-20 minutes, stirring once at the 10-minute mark. Keep the oven temperature the same for even caramelization.
How do I know when they're done?
Seeds are done when they're deeply golden brown, fragrant, and sound hollow when tapped. They'll continue to crisp as they cool, so remove them from the oven just before they reach your ideal level of crunch.
More Halloween Treats

🔒 From the Vault — 43,000+ premium recipes

Cook This Next